My uncle got married last week, and my mom volunteered the two of us to make the desserts for the reception, as well as, the cake. I was very happy that they said yes, but then, I thought of something important...How on earth were we going to transport everything all the way to Nebraska?! Well, we decided to freeze everything before we had to go, and then pack it all in a hardside suitcase with bubble wrap for the plane ride there, and it worked out perfectly!!!
My soon-to-be aunt's dress was a short, casual white one, with a tropical pink and brown flower print, and those were their wedding colors. The next thing that we did was plan the dessert menu. They asked us if we would make sandwich cookies, small things for people to munch on, and they requested either white or yellow cake with a fruit filling. My uncle kept asking for kiwi desserts, but since we didn't have experience with any we told him 'sorry'.
This is what we ended up doing:

(Pictured above - starting at the bottom, and moving clockwise) Greek Almond Cookies, Butter Cupcakes with
Wilton Buttercream Frosting, Butter Cake with Crushed Pineapple Filling and
Wilton Buttercream Frosting,
Bakerella's Vanilla Oreo Cookie Truffles, and
Brownie Cutouts with Melted Chocolate and
Raspberry Almond M&M'S. Not shown:
Fancy Flours No-Fail Sugar Cookies filled with raspberry jam. YUMMY!!!!!!!!!!!!!

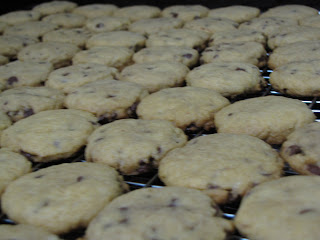
The Greek Almond Cookies are my mom's own recipe, and they are a delicious, simple cookie. On their own, they aren't sweet, but once you roll them in confectioner's sugar they are perfect! Here is her recipe:
Preheat your oven to 350 degrees Fahrenheit.INGREDIENTS:1 cup butter, room temperature
1/4 cup granulated sugar
1 teaspoon vanilla extract
2 cups all-purpose flour
1 cup almonds, toasted and ground
Confectioners sugar, for rolling
INSTRUCTIONS: 1. Toast almonds at 350 degrees for 6 minutes. DO NOT BURN! Remove from oven and let cool. Grind these either with a nut grinder or the smallest side of a box grater, but do NOT put these in your food processor, as it will turn it into a flour, rather then a coarse meal.
2. Cream butter, sugar, and vanilla
3. Add flour and ground almonds; mix well.
4. Scoop out balls with a cookie scoop, in your size choice. Roll the balls smooth in your hands, and then place them on a light-colored cookie sheet. For mini-cookies, cook them for about 5-6 minutes. For regular size cookies, cook them for about 8-9 minutes. For large cookies, cook them for about 12-13 minutes. Take them out of the oven and set them on a cooling rack.
5. Once the cookies are cool to the touch, pour a large amount of confectioner's sugar into a small bowl. One at a time, roll the cookies in the powdered sugar until they are completely covered, and transfer them to your serving tray of choice for everyone(or just you, of course) to enjoy!
For the sandwich cookies, I halved the
Fancy Flours recipe for No-Fail Sugar Cookies, and cut them out with a 1-3/4 inch biscuit cutter. I baked them for about 5 minutes, froze them afterward, and when we got to Nebraska we filled them with sugar-free raspberry jam and wrapped them in cellophane so that they could be passed out as favors.
Tricia-Rennea created a fabulous wrap for the cookie packages, but we ran out of time before we left and weren't able to print them out. You can see from the picture above and if you visit the link for the wrap, that it really would have made the favors pop. We were amazed at how closely Tricia-Rennea was able to mimic the dress pattern.
For the Oreo Truffles, we used
Bakerella's recipe, but substituted Golden Vanilla Oreos instead of the chocolate ones. We dipped them into white candy bark and topped them with chocolate jimmies for added cuteness.

For the brownie cutouts, I used the
Baker's One-Bowl Brownie recipe, and I baked them in a small cookie sheet lined with buttered parchment paper. Once they were cool, we cut them out with a 3/4 inch biscuit cutter and froze them. When we got to Nebraska, we melted some chocolate chips, poured a small amount on each brownie, and topped them with the specialty M&M's.
For the cake and cupcakes, I used a
Better Homes and Gardens recipe that I doubled to make to round cakes and just over 2 dozen cupcakes. They were both frozen after they were done, and when we got to Nebraska, we spread crushed pineapple in between the two layers and decorated both the cake and cupcakes with
Wilton's Buttercream Frosting. When I made the frosting, I made 1 1/2 batches, and I added 2 tablespoons of meringue powder for stiffness. We frosted everything with a smooth layer of white frosting, and then added flower designs in hot pink frosting.

Everything came out wonderful, and everyone was 'oohing' and 'aahing' over the cute desserts. The highlight was when the bride and groom went to cut their cake - they couldn't get through it because it was still frozen. HAHAHAHA! We didn't take it out of the freezer early enough. I enjoyed myself immensely, and I look forward to doing things like this in the future.
Thanks!
Bitsy


