Showing posts with label Recipes. Show all posts

Saturday, September 5, 2009

It's Like I'm in Hawaii!


In my house, we have a borderline-creepy obsession with Psych, an awesome-sauce show
about a fake psychic, Shawn and his best friend/business partner, Gus (who we all know is the
real star). To try to soothe our pain over the lack of a new episode this week, I made these
cupcakes to get some pineapple goodness out of our weekend:Pineapple Macadamia Nut
Cupcakes with Momma's Spoonful Frosting!
These were thought of by my mom, who love-love-loves Hawaii and anything pineapple. I went for a more muffin-ish cupcake (I know, I know, the horror!) and they came out exactly the way I wanted them! Yay! The texture was nice and chewy, and the nuts added just the slightest crunch. These are a diabetic-friendly cupcake, as there is only 2 tablespoons in the entire recipe, but the frosting is what'll get you on the sugar overload! Anywho, here is the brand-spankin'-new recipe:

(Makes 12 regular cupcakes)
1/3 cup canola or vegetable oil
2 TBS granulated sugar(optional)
1 cup pureed pineapple
1/2 cup pineapple juice
2 tsp apple-cider vinegar
1 tsp vanilla extract
1-1/2 cups all-purpose flour
1-1/2 tsp baking powder
1 tsp baking soda
1/4 tsp salt
1/2 cup macadamia nuts, coarsely chopped
----------------------------------------------------------------------------------------------------------
1- Preheat your oven to 350 degrees Fahrenheit; line a 12-cup cupcakes pan with liners.
2- Mix your wet ingredients in a small bowl.
3- Mix your dry ingredients in the mixer bowl. Add the liquid to the dry in two batches, and mix thoroughly. Gently beat in the macadamia-nuts.
4- Fill your cupcake liners 3/4 of the way full. Bake for 16-18 minutes, or until a toothpick inserted in the center comes out clean.
5- Cool your cupcakes on a rack completely while you make your frosting!

Momma's Spoonful Frosting:
(A warning - this doesn't pipe well so spread,aq so just scoop it on.)
1/3 cup margarine(I used Earth Balance)
2/3 cup butter-flavored Crisco
1-1/3 cups confectioners sugar
1 tsp vanilla extract
1-2 tsp soy-milk (optional)
3 TBS malted milk powder (I used Carnations original)
Dash coconut extract (optional, but that's what I did this time)
----------------------------------------------------------------------------------------------------------
1- Cream your margarine and shortening in a mixer.
2- Beat in the confectioners sugar, vanilla, and soy-milk.
3- Add in the malted milk powder(and coconut extract, if you're using it) and beat until the frosting is smooth and creamy.
4- Frost your cupcakes and enjoy!

This is the frosting that I use in my little fake vegan Twinkie-like cream canoes, and it is soooo good. It really sucks if you want to pipe it though....I usually just smear it on a cupcake right before I eat it, or I scoop some on top with a cookie scoop if I want it to look fancy-schmancy. Ha-ha! Okie-dokie then, I think I'm done with the blogging for today because my eyes hurt! Until next time, I hope you enjoy these!

Sunday, May 31, 2009

If at first you don't succeed...

Find another pan!

Today, I wanted to make some mini-brownie cupcakes for my uncles wedding this week, and it was going smoothly, until....DISASTER STRUCK!!!!  After I had baked them in a mini-cupcake pan that I had sprayed with baking spray, they wouldn't come out!  I turned the pan over and shook it, tried to pry them out with a bamboo skewer, and then resorted to scraping them out with a small rubber spatula(those little suckers were about as hard as concrete glue).  My mom went to the store, but sadly she couldn't find any greaseproof liners for the mini pan, so my brownie bites idea was thrown overboard.  I was disappointed, as I hadn't had trouble with this recipe before(well...when I was following the directions), and I had to come up with another idea, as I still had a bowl of uncooked brownie batter on the counter.  
     
I still wanted round brownies, to match the other goodies that we're making, so I decided to copy my mom's idea from last winter, and just bake them in a flat cookie sheet.  After they were done baking and had cooled, they were punched into small circles with a 1 1\4 inch biscuit cutter and put in a freezer bag to harden up for the scary plane ride they have to take in a few days.  While I didn't get to have what I had envisioned, or as many as I had hoped for, it turned out all right in the end.  On the bright side, we then had yummy brownie scraps to eat after we cut them out!  


  I used the Baker's One-Bowl Brownies recipe, substituting one cup of chopped walnuts in place of pecans.  I used a medium-sized jelly roll pan, lined with buttered parchment paper, and cooked for 30 minutes.  The cookie sheet was too large for a single batch of brownies to fill it, so I only spread the batter in it halfway.  I would recommend using the smallest cookie sheet you have.  But really, depending on the thickness that you want your brownie cutouts, use whatever pan you want, as long as you have a liner!!!!  If you decide to use this recipe, pop on over to Mrs. Tricia's blog for pretty recipe cards that are a nice alternative to notebook paper. 

Saturday, May 23, 2009

Mini Chocolate Chip Sandwich Cookies

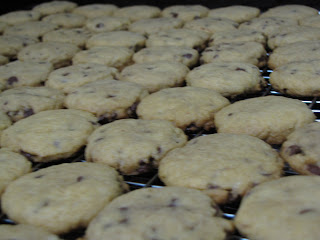
This week I made mini-chocolate chip cookie sandwiches!!!  They were for an event at the library, and they were well-liked by everyone.  ;)  They came out very cute, and very tasty!

I used the Nestle Tollhouse Chocolate Chip Cookie recipe, with a few changes.  Instead of using butter, I used butter-flavored Crisco, as it yields a softer cookie.  The salt was reduced to 1/4 teaspoon, and the chocolate chips were reduced to 1 cup.  For this batch of cookies, I omitted the nuts since these were for a group of people other than family, and I didn't want to risk someone with a nut allergy eating one!!  I used mini chocolate chips because I used a mini cookie scoop.


When I put these on the pan to bake, I used the bottom of a glass cup to flatten them into a more sandwich-friendly thickness.  I baked them for 6 minutes, and they came out slightly crispy, so I would recommend baking them for only 4-5 minutes for a nice soft cookie.


Once these were all made, I put them in the fridge overnight.  The next morning, I made the filling, using Bakerella's Easy Buttercream Frosting recipe.  It was absolutely wonderful!!!!  It had the easily spreadable texture of the tubs of frosting that you can buy at the store.  It had a sugary, vanilla taste, and I loved it!  Thank you Bakerella!!!!  


I filled the cookies with the frosting using a pastry bag fitted with a Wilton #12 tip (a round tip), putting a big blob in the center of one cookie and topping it with another.  For added cuteness, I rolled the edges in rainbow jimmies then froze the whole batch.  They came out soft and delicious!  I would highly recommend a plate and napkin (you might lose some jimmies or frosting when you take a bite).


Here are some other nice sandwich cookie ideas:


And if you want to see more, go to Flickr for more!!!